Working note
Deep dish pizza
How to make deep dish pizza at home: pan dough, lining, build order, bake time and temperature, and releasing the pie.
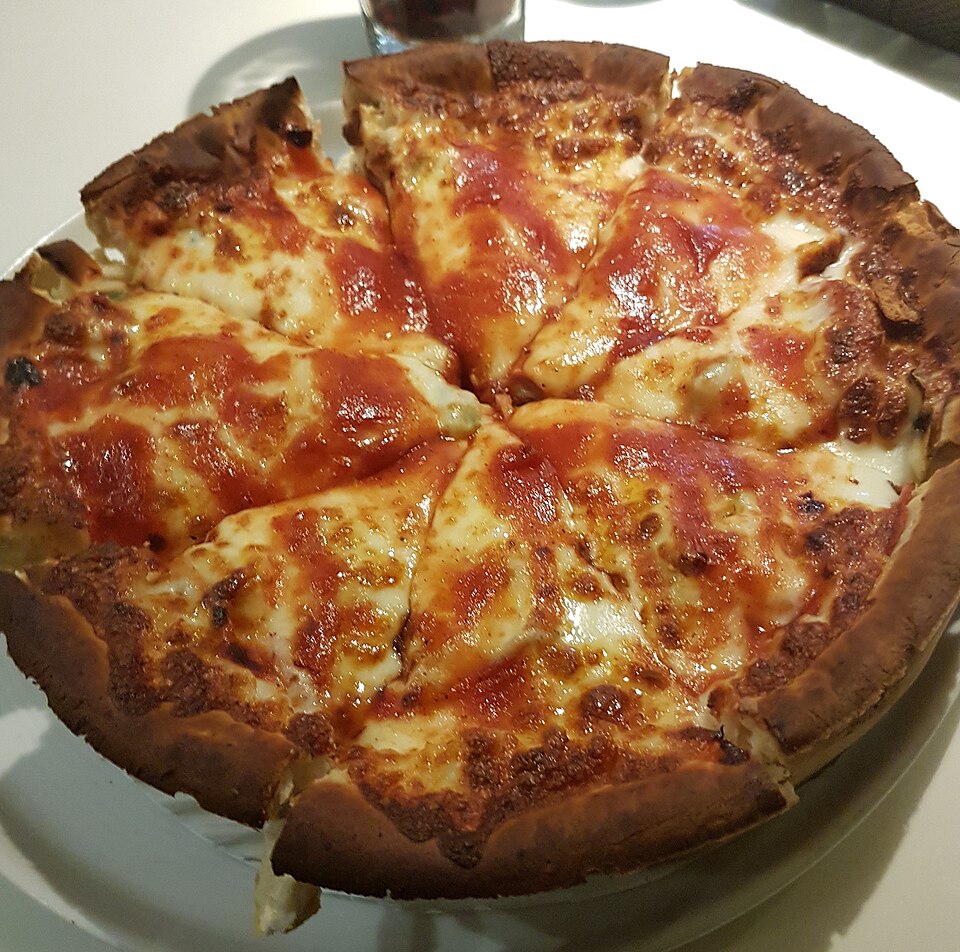
Dough for a deep pan: fat, low hydration and the biscuit-like crumb
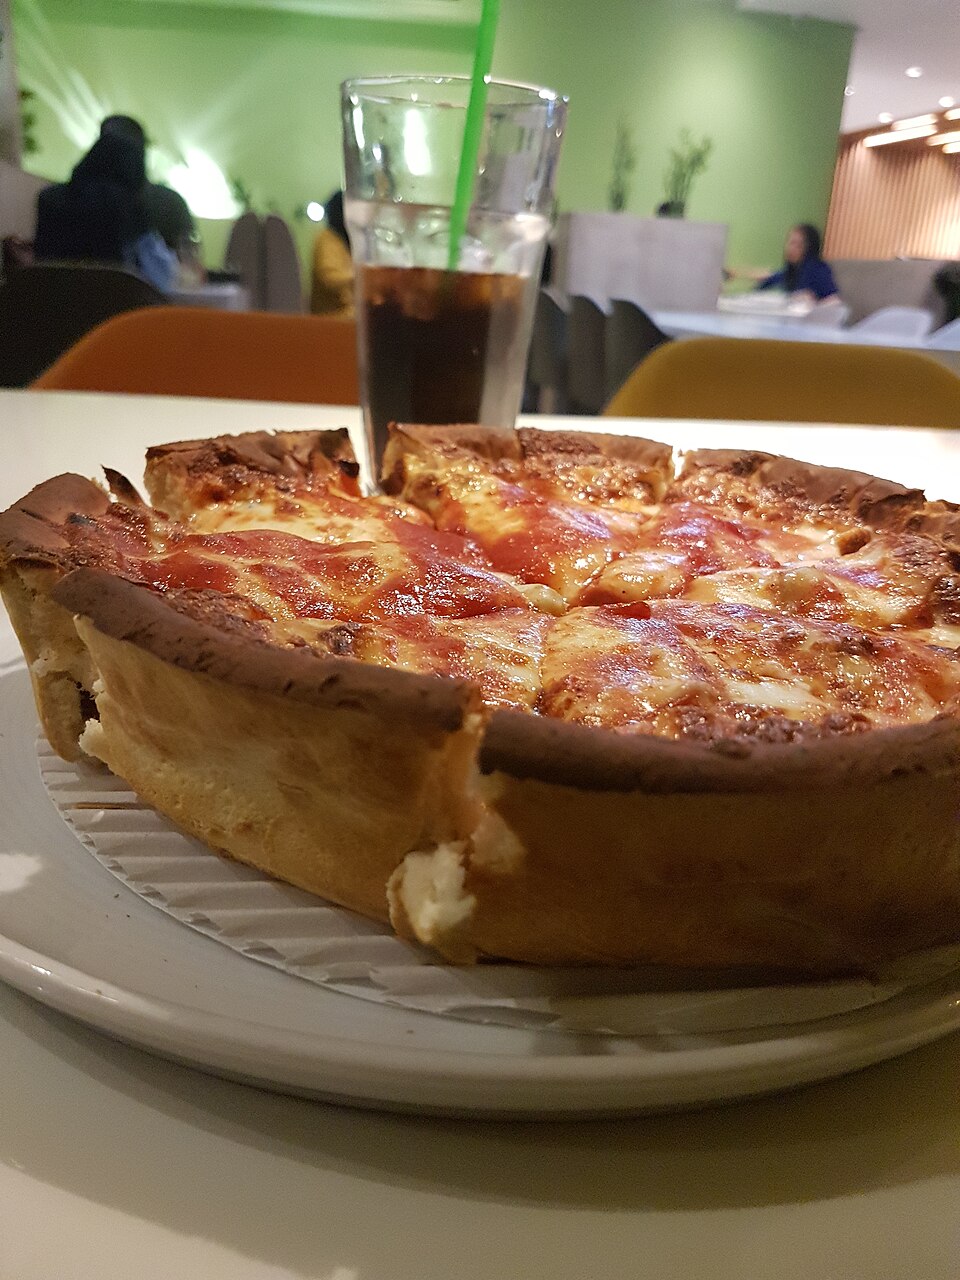
A deep dish dough is not a stretched round. It is pressed into the pan, up the wall, and it holds that shape through a long bake under a heavy load. The dough that does this carries fat in it rather than only around it, and it carries less water than a thin-crust formula.
The earliest published version of this style was made with scalded milk, butter and sugar, cooked in a pie pan or cake tin and published in 1945 by Riccardo, whose recipe predates the wider spread of the form. That combination points at what the dough is doing: the fat shortens the crumb so it stays tender rather than chewy, and the sugar gives the crust something to brown with early, before the interior has finished setting.
Lower hydration matters for a different reason. A wet dough slumps. Pressed into a pan and loaded from above, a wet dough flows back down the wall and leaves the outer edge thin, which is exactly where a deep dish needs thickness to survive the bake and to release cleanly later. The dough should feel firm and slightly tacky, not slack. It should press out under the palm without springing back hard, and it should hold a vertical wall when you push it up the side.
Fat content is the variable to change first if the crumb comes out wrong. More fat gives a shorter, more biscuit-like interior; less gives something closer to bread. Because the dough is pressed rather than stretched, gluten development matters less here than in a thin crust, and a dough mixed only until it comes together will press out fine.
Laminating butter or oil and lining the pan wall
The pan wall is the part of a deep dish that most home bakes get wrong, and it is a lining problem before it is a dough problem. Whatever fat goes on the wall decides whether the crust fries against the metal, browns along its full height, and lets go at the end.
The order is fat first, then dough, then more fat if you want a crisp outer face. Coat the wall and the floor of the pan completely. Press the dough from the centre outward, working it up the side rather than trying to drape it, and let the top edge of the dough sit slightly above the rim. A dough edge that clears the rim gives the crust somewhere to go as it rises and keeps the fill from spilling over the side during the bake.
For laminating, softened butter or a neutral oil applied to the dough after it is pressed in gives a separate, flakier outer layer once baked. The choice between them is a browning choice: butter brings milk solids that colour quickly, oil does not. Whichever you use, use enough that the surface looks glossy rather than damp.
Pan dimensions set how much dough you need and how deep the fill can go. A deep dish pan runs 30 to 40 cm (12 to 16 in) in diameter and 2.5 to 7.5 cm (0.98 to 3.0 in) deep. Dough quantity scales with the pan's area and with how far up the wall you press it; a deeper pan takes more dough for the same diameter because the wall is taller.
Build order: cheese down, sauce on top, and why
Cheese goes in first, directly onto the dough. Sauce goes on top of the cheese. This is the reverse of a thin-crust build and it is not a stylistic preference.
Two things happen when cheese sits under the sauce. The cheese is shielded from direct oven heat, so it melts into a continuous layer instead of blistering and drying before the middle of the pie has set. The sauce, sitting on top, is the part exposed to the element, and a wet sauce layer can take that exposure without turning to leather the way exposed cheese does over a long bake.
The sauce layer also weighs down the fill and helps hold the cheese in place when the pie is cut. A recipe in this style calls for one or more cans of prepared or homemade pizza sauce, 170 to 225 g (6.0 to 7.9 oz) each, which is generous enough to cover a full 30 to 40 cm pie.
Additional fillings, if you use them, go between the cheese and the sauce, or under the cheese if they are wet and would otherwise steam the crust. Treat them as a load on the bake rather than as the point of it; anything added above the sauce is exposed to the full heat of the oven for the whole bake.
Bake time and temperature for a 2 to 3 inch depth without a raw base
A deep dish needs a long bake at a moderate temperature. The reference point for a home oven is 25 to 30 minutes on a rack of the preheated oven, until the crust and cheese are lightly brown. That is the time for the full depth of the pan, not for a shallow version of it.
The reason the time is long is the depth. A two to three inch fill of dough, cheese and sauce is a thermal mass, and the heat has to travel down through the sauce and cheese to set the dough at the bottom of the pan. If the oven is too hot, the top and the rim colour and then burn while the base is still raw and pale. If it is too cool, the crust dries out before it browns. The 25 to 30 minute window at a moderate setting is the range in which the base has time to set and the top has time to brown, and both finish together.
Place the pan on a rack in the lower half of the preheated oven rather than directly under the element, so the base gets heat from the pan and the floor of the oven rather than from above. A preheated stone or steel under the pan helps here for the same reason it helps a thin crust: it puts heat into the bottom of the pan at the start of the bake, which is where a deep dish is most at risk of coming out underdone.
Check the pie at 25 minutes and judge it on the crust and the cheese, not the clock. If the top is brown and the rim has pulled slightly from the wall, it is done. If the top is brown but the rim is still stuck to the pan, give it a few more minutes; the crust has not finished setting.
Releasing the pie and cutting it
Let the pie rest in the pan for a few minutes after it comes out. The fill is still moving at that point, and a pie turned out immediately will slump and lose its shape before it reaches the board.
Run a thin blade or a small offset spatula around the wall, all the way down to the floor of the pan, before you try to lift the pie. The crust has been pressed up the side and baked against it, and it will be stuck wherever the fat layer was thin. Work around the full circumference rather than levering at one point, which tears the wall.
Turn the pie out onto a board or a plate, then invert it again if you want it right side up. A deep dish is heavy and the cheese layer is on the bottom of the fill, so support the whole base with a plate rather than lifting by the rim.
Cut it with a sharp knife or a wheel, not a rocker. The crust is thick at the edge and the fill is deep, so a single firm push works better than a sawing motion, which drags the cheese and sauce across the cut. Cut from the centre outward and wipe the blade between slices; the cheese layer under the sauce will cling to it otherwise.